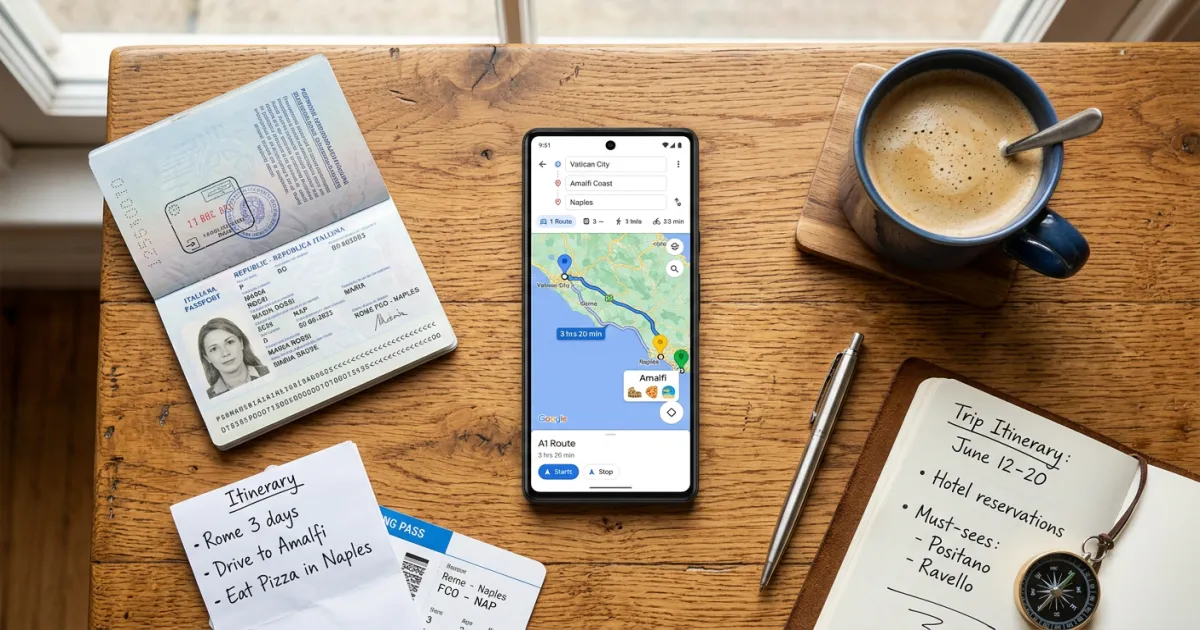
Google Maps is the most powerful free trip planning tool available to travelers in 2026. Whether you are mapping out a weekend getaway or a multi-city international adventure, Google Maps and its companion tool My Maps give you everything you need to organize destinations, plan routes, save offline maps, and navigate in real time.
This guide walks you through every step of planning a trip on Google Maps, from creating your first custom map to using advanced features like Immersive View and the new Ask Maps AI assistant.
Why Use Google Maps for Trip Planning
Before diving into the how-to steps, here is why Google Maps remains the go-to planning tool for millions of travelers:
- Completely free with no premium tier required for trip planning features
- Visual planning lets you see exactly where hotels, restaurants, and attractions sit relative to each other
- Shareable maps allow your travel companions to view and even edit your itinerary
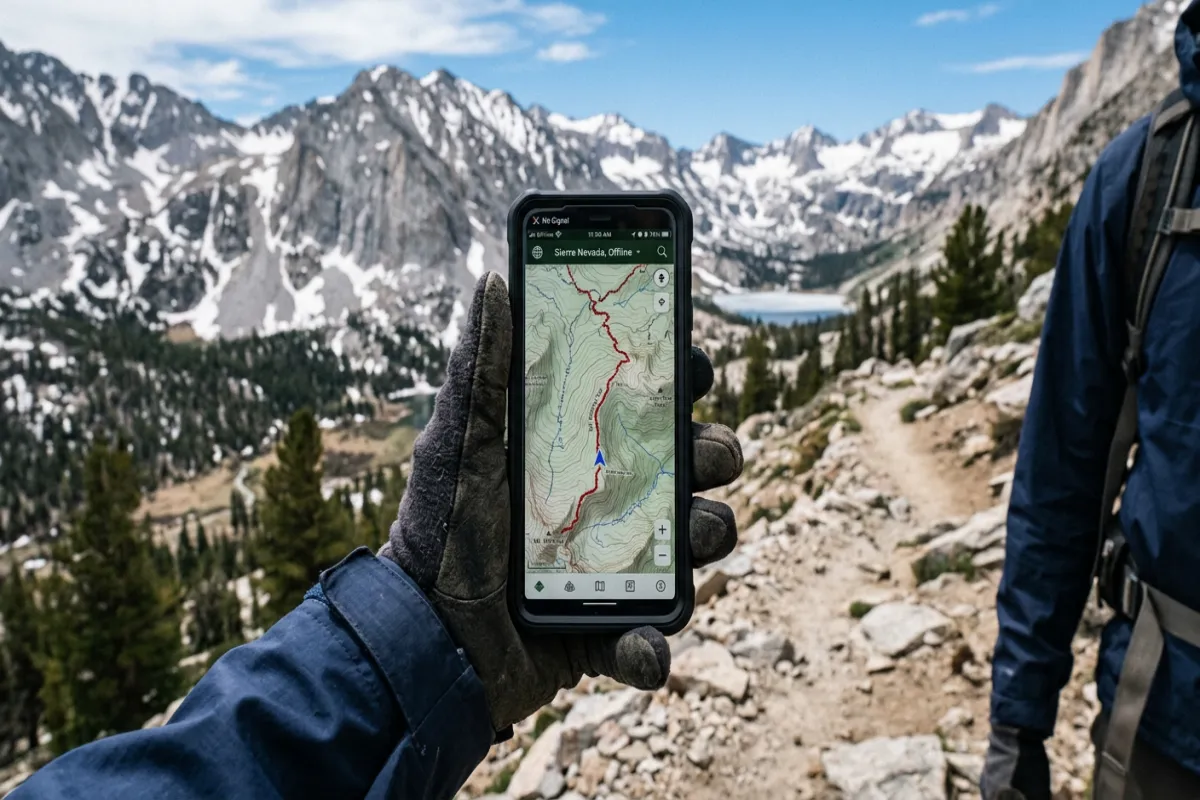
- Offline capable so you can navigate without data or Wi-Fi in remote areas or abroad
- Real-time information including traffic, transit schedules, business hours, reviews, and crowd levels
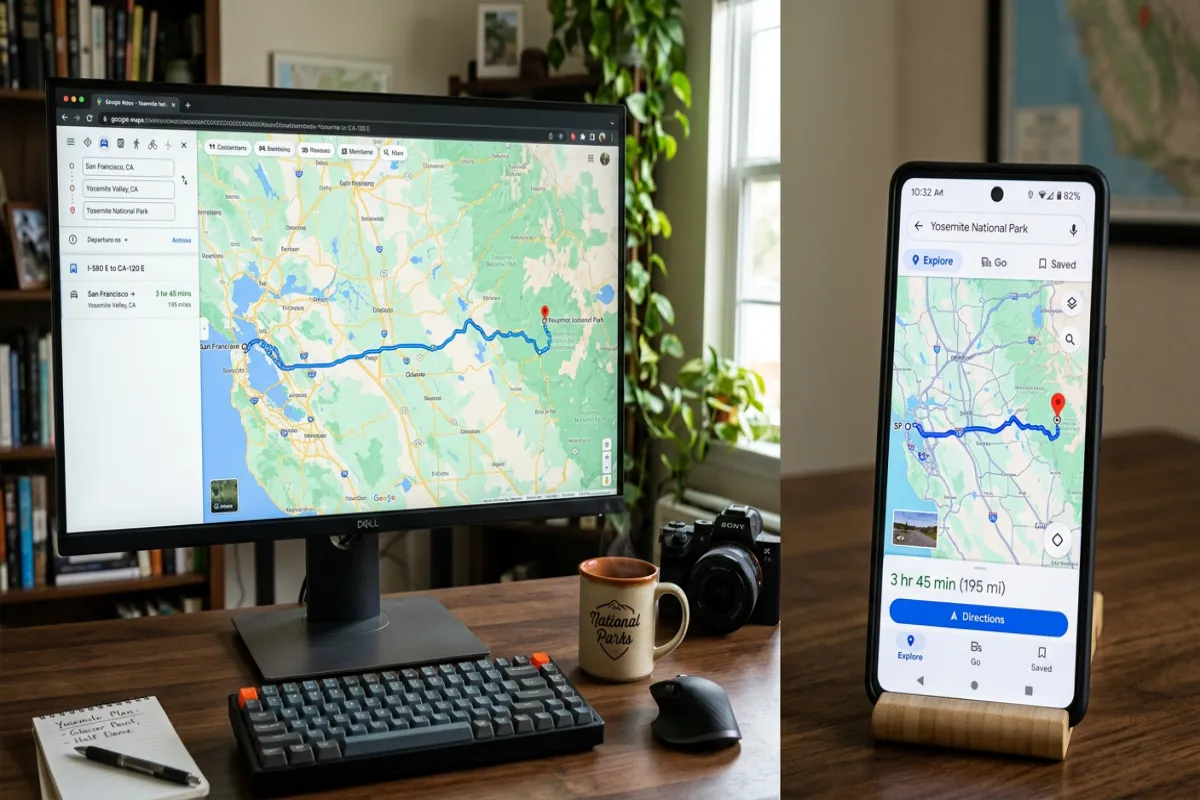
- Cross-device sync between desktop and mobile through your Google account
If you are still in the early stages of figuring out your trip, check out our complete guide to planning a trip for a broader framework before zooming into the mapping details.
Google Maps vs. My Maps: Which Should You Use?
Google actually offers two mapping tools, and understanding the difference will save you time:
Google Maps (the main app)
- Best for real-time navigation, turn-by-turn directions, and discovering nearby places
- Supports up to 10 stops in a single route
- Available on mobile (iOS and Android) and desktop
- Includes Saved Places, Lists, and offline map downloads
Google My Maps
- Best for pre-trip planning, creating custom maps with multiple layers
- Supports up to 10 layers per map, with up to 2,000 places per layer
- Custom icons, color coding, notes, photos, and descriptions for each pin
- Collaborative editing so travel companions can add their own suggestions
- Works best on desktop; has a separate mobile app with limited editing
The best approach: Use My Maps on your desktop to plan and organize your entire trip, then use the Google Maps app on your phone for navigation and real-time info while traveling.
How to Create a Trip on Google My Maps (Step by Step)
My Maps is the heart of Google’s trip planning capability. Here is how to set up your trip map from scratch.
Step 1: Open Google My Maps
Go to mymaps.google.com in your desktop browser and sign in with your Google account. Click the red “Create a New Map” button.
Step 2: Name Your Map
Click “Untitled Map” in the top left corner. A dialog box will open where you can add your map name (for example, “Italy Trip – September 2026”) and an optional description.
Step 3: Create Layers for Each Day or Category
Layers are the key to keeping your trip organized. Click “Add layer” in the left panel to create a new one. You can organize layers by:
- Day (Day 1 – Rome, Day 2 – Florence, Day 3 – Venice)
- Category (Hotels, Restaurants, Attractions, Transportation)
- City for multi-city trips
Each map supports up to 10 layers, which is plenty for most trips.
Step 4: Add Pins for Your Destinations
Use the search bar at the top to find hotels, restaurants, attractions, and landmarks. When the location appears on the map, click “Add to map” at the bottom of the popup. The pin will appear under whichever layer you have selected in the left panel.
Step 5: Color Code and Customize Icons
Hover over any location in the left panel and click the paint bucket icon that appears. You can:
- Change the pin color (use green for hotels, red for restaurants, blue for attractions, etc.)
- Select from dozens of icons (museum, park, restaurant, shopping, airport, and more)
- Add photos and notes to each pin for reference
Step 6: Add Notes and Details
Click on any pin to open its info window. Click the pencil icon to edit. Add useful notes like confirmation numbers, opening hours, cost estimates, or links to booking pages. These notes will be visible to anyone you share the map with.
Step 7: Share with Travel Companions
Click the Share button. You can set permissions to “Anyone with the link can view” or invite specific people by email. For collaborative planning, give your travel partners “Can edit” access so they can add their own pins and suggestions.
For a deeper dive into building custom itinerary maps, see our guide on how to create an itinerary on Google Maps.

Planning Your Route on Google Maps
Once your pins are placed on your My Maps board, it is time to plan the actual routes you will take between stops.
Adding Directions Between Stops
- In My Maps, click the directions icon (the arrow) below the search bar
- A new directions layer will appear. Enter your starting point (Point A) and destination (Point B)
- Add additional stops by clicking “Add destination”
- Choose driving, walking, or cycling mode
Using Google Maps for Multi-Stop Routes
In the main Google Maps app, you can plan routes with up to 10 stops:
- Open Google Maps and enter your first destination
- Tap Directions
- Tap the three-dot menu and select “Add stop”
- Enter each additional stop
- Drag and drop stops to reorder them and optimize your route
Route Planning Tips
- Check estimated drive times at different times of day, since traffic patterns change significantly
- Look for toll roads in the route options and toggle them off if you want to avoid tolls
- Use Street View to preview tricky intersections, parking areas, or hotel entrances before you arrive
- Compare transportation modes to see whether driving, transit, or walking makes more sense for each leg
Using Lists and Saved Places
Google Maps has a built-in system for saving places that works alongside My Maps.
How Saved Places Work
When you find a place on Google Maps, you can save it by tapping the Save button. Google offers three default lists:
- Favorites (heart icon) for your top picks
- Want to go (bookmark icon) for places on your wish list
- Starred places (star icon) for general bookmarks
Creating Custom Lists
Tap “New list” to create trip-specific lists like “Tokyo Restaurants,” “Paris Museums,” or “Road Trip Gas Stops.” You can:
- Add descriptions and notes to each saved place
- Share lists with others via a link
- View all saved places on the map with colored pins
Custom lists are especially useful for organizing recommendations from friends, travel blogs, or social media into categories you can easily reference during your trip.
Downloading Offline Maps
Offline maps are essential for international travel where data roaming is expensive, or for remote areas with spotty cell coverage.
How to Download Offline Maps
- Open Google Maps on your phone
- Search for your destination city or region
- Tap on the city name or info bar at the bottom
- Scroll down and tap “Download offline map”
- Adjust the blue rectangle to cover the area you need
- Tap Download
What Works Offline
- Turn-by-turn driving and walking navigation
- Searching for downloaded places by name
- Viewing the map, streets, and basic place information
What Does Not Work Offline
- Real-time traffic data
- Transit directions (bus, train, subway schedules)
- Business hours and reviews
- Street View
- Immersive View
Storage and Management Tips
- A typical city map download uses 50 to 200 MB of storage
- Downloaded maps expire after 365 days but can be updated anytime while connected
- Download maps over Wi-Fi before your trip to avoid using mobile data
- You can manage and delete downloaded maps in Settings > Offline maps
Real-Time Features During Your Trip
Once you are on the ground, Google Maps transforms from a planning tool into your real-time travel assistant.
Traffic and Navigation
Google Maps uses real-time traffic data to suggest the fastest route and provides updated arrival time estimates as conditions change. The traffic layer shows color-coded road conditions at a glance (green for clear, yellow for slow, red for heavy traffic).
Transit Directions
Get step-by-step transit directions including which bus, train, or subway to take, which stop to get off at, and how long each leg will take. In many cities, Google Maps shows real-time departure times rather than just scheduled ones.
Restaurant Hours, Reviews, and Menus
Tap any restaurant to see current hours, ratings, reviews, photos, and often the full menu. The “Popular times” graph shows you when a restaurant is typically busiest, helping you avoid long waits.
Google Lens Integration
Use Google Lens through the Maps camera to translate signs, menus, and other text in real time. This is incredibly useful for navigating restaurants in countries where you do not speak the language.
Street View
Preview any location before you go. This is particularly useful for finding your hotel entrance, checking out the neighborhood around your Airbnb, or getting a feel for a hiking trailhead.
Google Maps Travel Features for 2026
Google has rolled out several major travel-relevant features in 2026:
Ask Maps (AI-Powered Search)
The new Ask Maps feature, powered by Gemini AI, lets you ask complex natural-language questions like “Where can I find a quiet cafe with Wi-Fi near the Colosseum?” or “Is there a playground near my hotel that is open in the evening?” Maps will return personalized, context-aware results instead of just a list of search matches.
Immersive View
Available in hundreds of major cities worldwide, Immersive View lets you explore destinations in photorealistic 3D before you arrive. It feels less like looking at a map and more like flying through the streets with a drone. You can preview landmarks, neighborhoods, and even see what places look like at different times of day and in different weather conditions.
Immersive Navigation
The biggest driving update in over a decade, Immersive Navigation provides a vivid 3D view while driving that reflects buildings, overpasses, and terrain around you. It highlights critical road details like lanes, crosswalks, traffic lights, and stop signs. This feature is rolling out across the U.S. on iOS, Android, CarPlay, and Android Auto.
Explore Tab
The Explore tab surfaces nearby restaurants, attractions, and activities based on your current location. Filter by category, rating, price, and hours to quickly find what you need.
Timeline (Trip Memories)
If you opt in, Google Maps Timeline records the places you visited during your trip. After your vacation, you can review your entire route day by day, which is great for creating trip reports or remembering that amazing restaurant you stumbled upon. Note that Timeline data is now stored on-device for privacy.
Tips and Tricks for Power Users
Share Real-Time Location
Tap your profile picture in Google Maps and select “Location sharing.” Share your real-time location with travel companions for a set duration or until you turn it off. This is invaluable for meeting up in crowded tourist areas or when splitting up for the day.
Send Directions from Desktop to Phone
When planning on your computer, click “Send to your phone” on any directions result. The route will appear as a notification on your phone, ready to navigate.
Measure Distances
Right-click any point on the map and select “Measure distance.” Click additional points to measure the total distance of a walking route or to estimate how far your hotel is from the beach.
Check Busy Times
Most popular restaurants, attractions, and shops show a “Popular times” bar graph. Use this to plan visits during off-peak hours and avoid crowds. Some locations also show live visit data (“busier than usual” or “not too busy”).
Wheelchair Accessible Routes
In transit directions, tap Options and enable “Wheelchair accessible” to filter for routes with step-free access, elevators, and accessible stations.
Check Gas and EV Charging Prices
Search for “gas stations” or “EV charging” to see current fuel prices and charger availability along your route. Google Maps now includes full EV trip planning with battery percentage estimates for each stop.
Limitations of Google Maps for Trip Planning
While Google Maps is incredibly useful, it does have some limitations to be aware of:
- My Maps has limited mobile functionality. You can view your custom maps on your phone, but editing is clunky compared to the desktop experience. Plan on a computer, navigate on your phone.
- My Maps does not sync perfectly to the Google Maps app. Custom maps appear under “Your places” > “Maps” in the app, but you cannot get turn-by-turn navigation directly from My Maps pins. You need to tap a pin and then manually request directions.
- Full features require internet. Offline maps cover navigation basics, but you lose access to reviews, photos, transit schedules, and AI features without a connection.
- No booking capability. Google Maps shows hotel prices and restaurant details, but you cannot make reservations or book hotels directly through the app. You will be redirected to third-party sites.
- 10-stop limit for routes. The main Google Maps app limits you to 10 stops per route. For longer itineraries, you need to create multiple routes or use My Maps.
- Limited day-by-day itinerary structure. Google Maps does not natively support timed itineraries with scheduled activities. It is a mapping tool, not a day planner.
When to Use Other Tools Alongside Google Maps
Google Maps excels at spatial planning, but a complete trip plan usually needs additional tools:
- Yopki’s AI travel planner for generating complete day-by-day itineraries with optimized routing, time estimates, and personalized recommendations. It builds the structured itinerary that Google Maps cannot.
- Vacation itinerary templates for organizing your schedule with times, bookings, and budget in one place
- Spreadsheets (Google Sheets or Excel) for tracking your trip budget, comparing hotel prices, and managing booking confirmations
- Airline and hotel apps for managing flights, check-in, boarding passes, and loyalty programs
- Translation apps for more comprehensive language support beyond what Google Lens offers
Step-by-Step Example: Planning a 5-Day Italy Trip on Google Maps
Here is a practical example that ties everything together. Let us plan a 5-day trip covering Rome, Florence, and Venice.
1. Create Your My Maps Board
Go to mymaps.google.com and create a new map called “Italy Trip – 5 Days.” Create five layers: Day 1-2 Rome, Day 3 Florence, Day 4-5 Venice, Hotels, and Transportation.
2. Pin Your Hotels
Search for your hotels in each city and add them to the Hotels layer. Use a green house icon for easy visibility. Add your confirmation number and check-in time in the notes field.
3. Add Attractions by Day
Research and pin your must-see attractions to the appropriate day layer:
- Day 1-2 Rome: Colosseum, Roman Forum, Vatican Museums, Trastevere neighborhood, Pantheon
- Day 3 Florence: Uffizi Gallery, Ponte Vecchio, Duomo, Piazzale Michelangelo
- Day 4-5 Venice: St. Mark’s Basilica, Rialto Bridge, Murano Island, Doge’s Palace
4. Add Restaurants
Search for highly rated restaurants near your planned attractions. Save them to each day’s layer using a red fork-and-knife icon. Check the “Popular times” data to plan reservations for off-peak hours.
5. Plan Transportation Routes
In the Transportation layer, add directions for your intercity travel:
- Rome to Florence: Search the route to compare train (1.5 hours by high-speed rail) vs. driving (3 hours)
- Florence to Venice: Similar comparison (2 hours by train vs. 3 hours driving)
6. Download Offline Maps
On your phone, download offline maps for Rome, Florence, and Venice. Each city will use roughly 100 to 150 MB. Do this on Wi-Fi before you leave home.
7. Share with Your Travel Group
Click Share and send the link to your travel companions. Set permissions to “Can edit” so everyone can add their own restaurant finds and suggestions.
For more Italy-specific planning advice, see our guide to planning a trip to Italy or our broader Europe trip planning guide.
Planning Tools at a Glance
| Tool | Best For | Platform |
|---|---|---|
| Google My Maps | Custom trip maps with layers, pins, and shared editing | Desktop (best), Mobile (view only) |
| Google Maps App | Navigation, real-time info, offline maps, saved lists | iOS, Android, Desktop |
| Yopki AI Planner | AI-generated day-by-day itineraries with time estimates | Web |
| Google Sheets | Budget tracking, booking info, packing lists | Web, Mobile |
Frequently Asked Questions
Is Google Maps free for trip planning?
Yes. Both Google Maps and Google My Maps are completely free to use for personal trip planning. There are no premium tiers or paid features for travelers.
Can I use Google Maps offline in another country?
Yes. Download the offline map for your destination city or region before you travel. You will be able to navigate and search for downloaded places without data or Wi-Fi. However, you will not have access to real-time traffic, transit schedules, or reviews until you reconnect.
How many stops can I add to a Google Maps route?
The Google Maps app supports up to 10 stops per route. If you need more, create multiple routes or use Google My Maps, which supports up to 2,000 locations per layer with up to 10 layers per map.
Can I share my Google Maps trip with someone who does not have a Google account?
For My Maps, you can set the sharing permission to “Anyone with the link can view,” which works for anyone with a web browser regardless of whether they have a Google account. Google Maps saved lists can also be shared via link.
Does My Maps work on my phone?
You can view your My Maps custom maps on your phone by opening Google Maps, going to “Saved” > “Maps,” and selecting your map. However, full editing is best done on a desktop. The separate My Maps app for Android offers basic editing but has limited features.
What is the difference between Google Maps and Google My Maps?
Google Maps is the main navigation app used for directions, traffic, and discovering nearby places. Google My Maps is a separate tool for creating custom maps with pins, layers, notes, and shared editing. Think of My Maps as the planning tool and Google Maps as the on-the-ground navigation tool.
Can Google Maps plan a road trip with multiple days?
Google Maps does not have a built-in multi-day trip planner. However, you can use My Maps to create separate layers for each day and add driving directions between stops. For a structured day-by-day itinerary with times and durations, consider using Yopki’s AI travel planner alongside Google Maps.