
How to Share a Travel Itinerary with Your Group
You spent hours building the perfect trip plan. Flights booked, hotels confirmed, restaurants researched, activities scheduled. Now you need everyone else to actually see it. And use it. And not text you every 20 minutes asking “what time is dinner again?”
Sharing a travel itinerary sounds simple, but the wrong approach leads to outdated PDFs floating in email chains, group chat messages nobody reads, and that one person who shows up at the restaurant at the wrong time because they were looking at last Tuesday’s version of the plan.
This guide covers every method for sharing a travel itinerary, with honest pros and cons for each, so you can pick what works for your group.
What to Include in a Shared Itinerary
Before choosing how to share, make sure your itinerary contains everything your travel companions need to follow the plan independently.
Essential Information
- Flight details: Airline, flight number, departure/arrival times, terminal, confirmation code
- Accommodation: Hotel or rental name, full address, check-in/out times, confirmation number, contact phone
- Daily schedule: Activities with times, addresses, and any booking confirmations
- Restaurant reservations: Name, time, address, reservation name and confirmation
- Transportation: Rental car pickup details, train tickets, airport transfer information
- Emergency info: Local emergency number, nearest hospital, travel insurance policy number and emergency line
Nice to Include
- Packing reminders specific to activities (hiking boots, formal attire, swimsuit)
- Weather forecast for the travel dates
- Local tips (tipping customs, transit info, useful phrases in the local language)
- Group-specific notes (meeting points, dress codes, cost-splitting details)
- Backup options in case of weather or closures
The goal: anyone in your group should be able to look at the itinerary and know where to be, when to be there, and how to get there without contacting you.
Method 1: Travel Planning App (Best for Groups)
Dedicated travel planning apps are built for exactly this problem. They let you build, share, and update itineraries in a format designed for travel.
How It Works
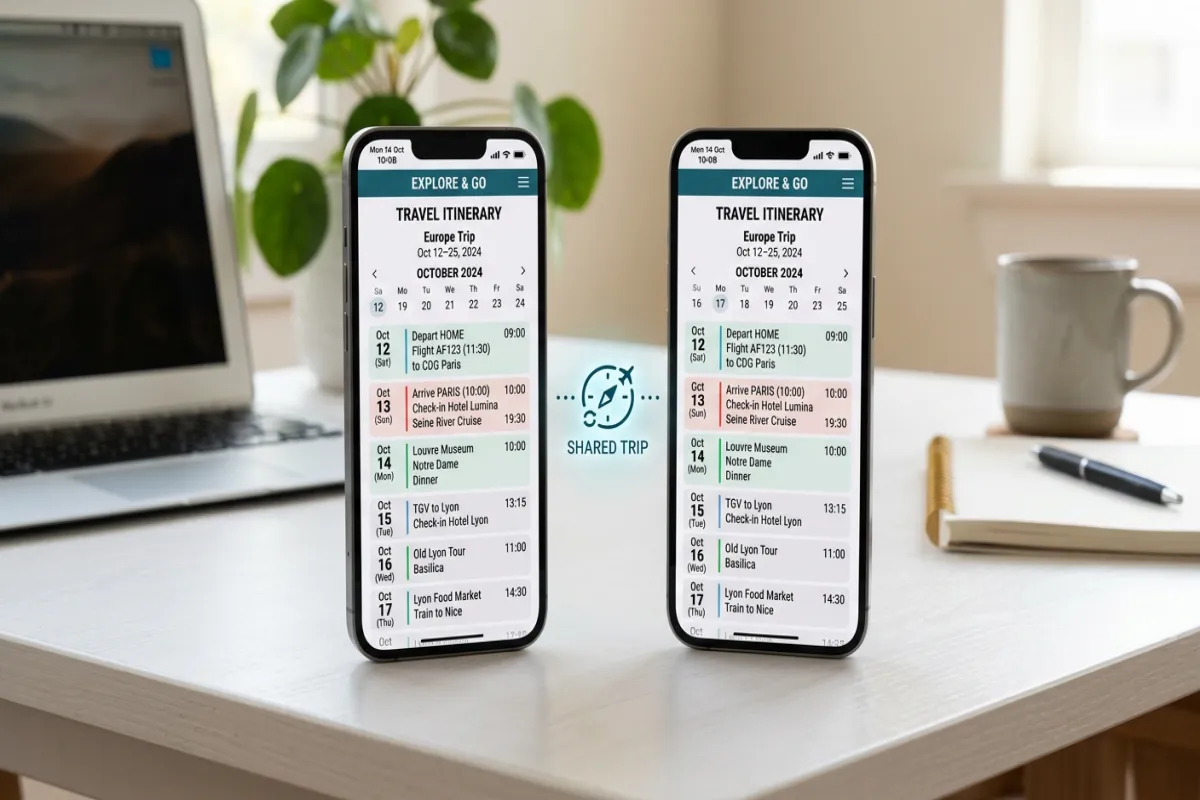
Yopki is built specifically for collaborative trip planning. You create your itinerary with a visual calendar view, add your travel companions, and everyone sees the same plan in real time. When you change a dinner reservation from 7:00 PM to 8:00 PM, everyone sees it immediately. No need to resend anything.
Key Features for Sharing
- Real-time sync: Changes appear instantly for all group members
- Visual calendar: See each day laid out with times, locations, and map pins
- Map view: All activities plotted on a map so you can see geographic relationships and plan routes
- Document storage: Upload booking confirmations, tickets, and travel documents that the whole group can access
- Collaborative editing: Group members can suggest activities, add notes, or mark preferences
- Mobile access: The itinerary is on everyone’s phone, accessible offline
- No version confusion: There is only one version of the plan, always current
Pros
- Purpose-built for travel itineraries
- Everyone always sees the latest version
- Visual layout is easier to follow than a text document
- Offline access means it works without Wi-Fi or cell service
- Keeps booking confirmations attached to the relevant activity
Cons
- Requires group members to use the app
- Learning curve for people unfamiliar with the platform
For groups that travel together regularly, or for trips with complex multi-day itineraries, a dedicated app saves significant time and eliminates the “which version is current” problem entirely.
Method 2: Google Docs or Sheets
Google Docs is the default choice for many group travel planners. It is free, everyone has a Google account, and it supports real-time collaboration.
How to Structure It
Create a Google Doc with clear headings for each day. Include times, activity names, addresses (linked to Google Maps), and confirmation numbers. Use bold text for key details and a table of contents at the top for quick navigation.
Alternatively, use Google Sheets with one tab per day and columns for time, activity, address, confirmation, and notes. Sheets work better for highly structured itineraries with lots of details.
Pros
- Free and familiar to most people
- Real-time collaboration and commenting
- Accessible from any device with a browser
- Version history lets you see what changed
- Easy to share via link
Cons
- Not designed for travel, so the layout is basic
- No map view or visual calendar
- Can become cluttered and hard to navigate for long trips
- No offline access unless you specifically enable it
- No way to attach documents to specific activities
- Someone inevitably reformats the whole document or deletes a section
Google Docs works well for simple trips with small groups. For complex itineraries or larger groups, it tends to become unwieldy.
Method 3: Email a PDF
The classic approach. Build your itinerary in any format (Word, Google Docs, a travel app), export it as a PDF, and email it to everyone.
Pros
- Universal compatibility. Everyone can open a PDF.
- Clean, formatted layout that looks the same on every device
- Works completely offline once downloaded
- Easy to print for people who prefer paper
- No account or app needed
Cons
- Static. Every change requires sending a new version.
- Version control is a nightmare. Which email has the latest PDF?
- No collaboration. Only the sender can make edits.
- Gets buried in email inboxes
- Cannot click addresses to open maps (in many PDF readers)
PDFs are best used as a supplement, not a primary sharing method. Export your final itinerary as a PDF for people who want a printout or a backup, but use a live document or app as the source of truth.
Method 4: Calendar Sync (Apple or Google Calendar)
Adding itinerary items to a shared calendar puts your schedule alongside people’s existing calendars, so they see trip activities next to their personal events.
How to Do It
Create a dedicated calendar (not your personal one) for the trip. Add each activity as a calendar event with the time, location, and notes. Share the calendar with your group. On Google Calendar, share via email. On Apple Calendar, use an iCloud sharing link.
Pros
- Integrates with tools people already use daily
- Notification reminders for each activity
- Location field links directly to maps
- Cross-platform (Google Calendar works on iPhone and vice versa)
- Free
Cons
- Awkward for detailed information. Calendar event descriptions are cramped.
- No visual itinerary view, just a standard calendar grid
- Hard to include context like “wear comfortable shoes” or “bring your passport”
- Mixing trip events with personal events can be cluttered
- No document attachment or map overview
Calendar sync works well as a companion to another sharing method. Use an app or document for the detailed itinerary and sync key events (flights, dinner reservations, checkout times) to a shared calendar for reminders.
Method 5: WhatsApp or iMessage Group Chat
Group chats are great for communication but problematic as an itinerary format.
Pros
- Everyone is already on their messaging app
- Instant updates and real-time discussion
- Easy to share photos, links, and quick updates
- Best tool for day-of changes and coordination
Cons
- Information gets buried in conversation threads immediately
- Impossible to find specific details later
- No structure, just a stream of messages
- Notifications can be overwhelming with large groups
- Critical information (confirmation numbers, addresses) gets lost between memes and jokes
Best Practice
Use the group chat for communication and the itinerary app or document for the plan. Pin the itinerary link at the top of the group chat so people can always find it. Post a daily summary in the chat each morning (“today’s plan: 9 AM museum, 12:30 lunch at [restaurant], 3 PM free time, 7 PM dinner at [restaurant]”).
The Best Approach: Combine Methods
No single method does everything well. The most effective approach combines two or three:
- Primary itinerary: A travel app like Yopki or a Google Doc with the full, detailed, always-updated plan
- Communication: A WhatsApp or iMessage group for daily coordination and changes
- Backup: A PDF export emailed to everyone before departure, plus a printed copy for anyone who wants one
- Optional calendar sync: Key events added to a shared calendar for reminders
The critical rule: designate one place as the source of truth. When something changes, update it there. Everything else is a mirror or a communication channel, not a competing version of the plan.
Sharing with Family Back Home
Sharing your itinerary with someone who is not traveling with you is a safety best practice, especially for international travel or solo trips.
What to Share
- Flight details (airline, flight numbers, departure and arrival times)
- Accommodation name and address for each night
- Your phone number abroad (if you have an international plan or local SIM)
- Travel insurance emergency contact number
- A rough daily schedule so they know where you should be
- Copies of your passport information page and travel insurance policy
How to Share
Email a PDF with the above details. For parents or family members who worry, give them view-only access to your full itinerary on Yopki so they can check where you are at any point without having to call.
Managing Changes and Updates
No itinerary survives contact with reality completely intact. Flights get delayed, restaurants close unexpectedly, weather changes plans. Here is how to handle changes without chaos:
Establish a Protocol
- One person (the trip organizer) makes changes to the primary itinerary
- Changes are announced in the group chat with a brief note (“moved dinner to 8 PM, updated in the itinerary”)
- For same-day changes, a group chat message is fastest
- For advance changes, update the itinerary first, then notify the group
Avoid These Mistakes
- Multiple people editing different versions. Designate one editor or use a platform with real-time sync.
- Sending a new PDF for every small change. Nobody will know which PDF is current.
- Making changes without telling anyone. Even if the itinerary auto-syncs, a quick heads-up in the group chat ensures nobody misses it.
- Over-communicating minor changes. If the activity start time shifts by 15 minutes, update the itinerary but save the group chat announcement for meaningful changes.
Frequently Asked Questions
What is the best way to share a travel itinerary?
Use a collaborative trip planning app like Yopki for the full itinerary, a group chat for daily coordination, and a PDF backup sent by email. The app serves as the single source of truth that everyone can access and that stays current automatically.
How do you share an itinerary with someone who is not tech-savvy?
Print a clean PDF with daily schedules, addresses, and phone numbers. Email it and text a browser-based link they can open without downloading anything. Keep the format simple with clear headers and full addresses.
What information should be in a shared travel itinerary?
Flight details with confirmation codes, hotel info with addresses and check-in times, daily activity schedules, restaurant reservations, transportation details, and emergency contacts. Include enough detail that someone can follow the plan without contacting you.
Should you share your travel itinerary with family?
Yes. Share flight details, hotel names and addresses, and a rough daily schedule with a trusted family member who is not traveling with you. This is a basic safety practice, especially for international or solo travel.
How do you manage itinerary changes with a group?
Use a single source of truth that all members can access. Make changes there, then post a brief note in the group chat. One editor, one plan, one communication channel.
Yopki is built for collaborative trip planning. Create your itinerary, invite your travel group, and everyone sees the same plan in real time. No more emailing PDFs, no more “which version is the latest” confusion. Try it for your next group trip.