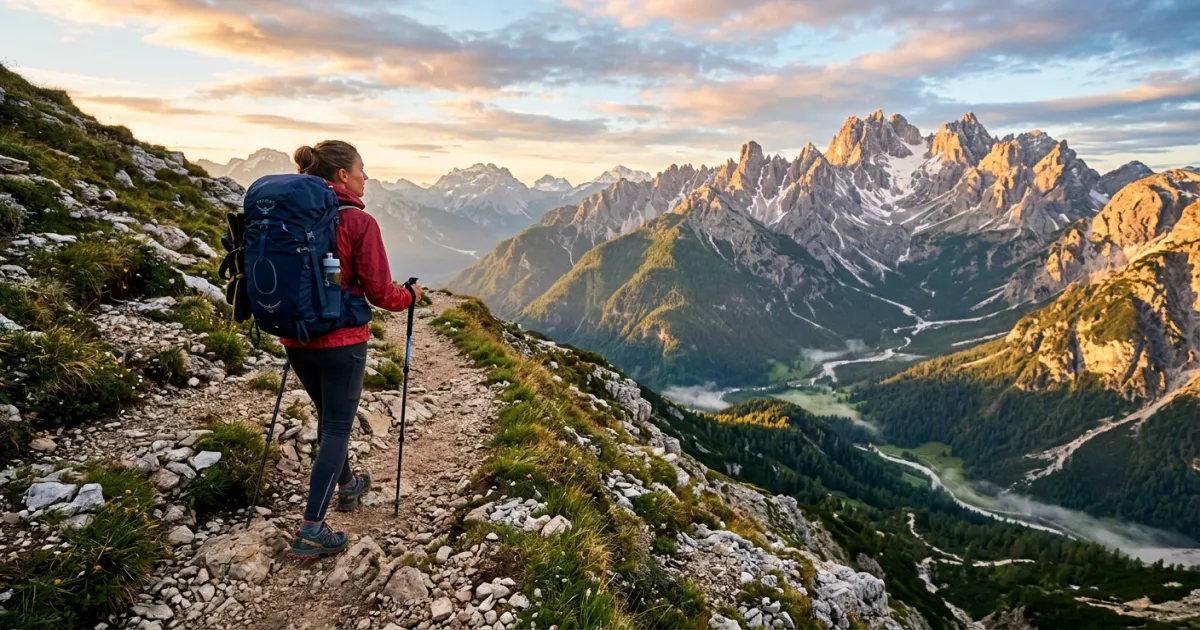
Planning a hiking trip takes more than just picking a trail and showing up. Whether you are heading out for a quick day hike near home or tackling a multi-day backcountry adventure, the right preparation makes the difference between a memorable experience and a miserable one. This guide walks you through every step of planning a hiking trip in 2026, from choosing trails to packing gear and staying safe on the trail.
If you are new to trip planning in general, start with our complete guide on how to plan a trip for foundational advice that applies to any kind of travel.
Types of Hiking Trips
Before you start planning, decide what kind of hiking trip suits your goals, fitness level, and available time.
Day Hikes
Day hikes are the most accessible option. You start and finish the same day, carrying only what you need for a few hours on the trail. These range from easy 2-mile nature walks to strenuous 15-mile ridge traversals. Day hiking is the best entry point for beginners and requires the least gear investment.
Overnight and Backpacking Trips
Backpacking trips involve carrying everything you need to camp overnight on the trail. You will need a tent or shelter, sleeping bag, cooking system, and enough food and water for the duration. A typical weekend backpacking trip covers 10 to 20 miles over two days. The added weight of overnight gear (usually 20 to 35 pounds) changes the physical demands significantly compared to day hiking.
Multi-Day Thru-Hikes
Thru-hikes are long-distance treks completed in a single continuous journey. Famous examples include the Appalachian Trail (roughly 2,190 miles), the Pacific Crest Trail (approximately 2,650 miles), and the Camino de Santiago (about 500 miles). These require months of preparation, careful resupply planning, and significant physical conditioning. Most thru-hikers budget $1,000 to $2,000 per month on trail for food, resupplies, and occasional lodging in towns.
Guided Hiking Tours
Guided tours let you experience challenging terrain without handling all the logistics yourself. Outfitters provide route planning, permits, gear, meals, and expert knowledge of the area. This option works well for international hiking trips, remote wilderness areas, or destinations where permits are difficult to obtain independently. Costs typically range from $150 to $500 per day depending on the destination and level of service.
Choosing Your Trail
Trail selection is the single most important planning decision. The right trail matches your fitness level, available time, and goals for the trip.
Research Tools
AllTrails is the most widely used trail research app, with over 400,000 trails mapped globally. The app shows trail distance, elevation gain, difficulty ratings, user reviews, and photos. Download offline maps before your trip in case you lose cell service on the trail. Other useful resources include the National Park Service trail databases, local hiking club websites, and guidebooks specific to your region.
Difficulty Ratings
Most trails use a simple rating system: easy, moderate, and hard (sometimes called strenuous). Easy trails are generally flat with minimal elevation gain and well-maintained surfaces. Moderate trails include noticeable elevation changes and may have uneven terrain. Hard trails involve steep climbs, significant elevation gain (often 1,000 feet or more per mile), scrambling over rocks, or exposure to drop-offs.
Distance and Elevation Gain
Elevation gain matters more than distance for estimating difficulty. A flat 8-mile hike is far easier than a 4-mile hike with 3,000 feet of elevation gain. A general planning guideline is that most hikers cover 2 to 3 miles per hour on moderate terrain, slowing to 1 to 1.5 miles per hour on steep inclines. Add about 30 minutes for every 1,000 feet of elevation gain to your time estimate.
Trail Conditions and Seasons
Trail conditions change dramatically with the seasons. Snow and ice can make high-elevation trails impassable from late fall through early summer. Spring brings mud and swollen stream crossings. Summer offers the longest daylight hours but also the highest temperatures and thunderstorm risk. Fall provides cooler temperatures and fewer crowds but shorter days. Always check current trail conditions on the land management agency website before heading out.
Permits and Reservations
Many popular trails now require permits, especially for overnight use. Some permits are free but still mandatory. Others, like the Half Dome cables permit in Yosemite, use a lottery system months in advance. Check permit requirements early in your planning process. For popular destinations, application windows often open in fall or winter for the following year’s hiking season. See our Yosemite trip planning guide and Glacier National Park guide for destination-specific permit details.
Crowds and Popularity
Popular trails can feel more like highways than wilderness. If solitude matters to you, consider hiking on weekdays, starting before sunrise, or choosing less well-known trails in the same area. AllTrails user reviews often mention crowd levels at different times of day and week.
Fitness Preparation
Your fitness level determines what trails you can safely and enjoyably tackle. The best time to start preparing is well before your trip.
Start with Shorter Hikes
If you are new to hiking, begin with easy trails of 3 to 5 miles and gradually increase distance and difficulty. This builds your trail legs and helps you learn how your body responds to hiking terrain. Pay attention to how your feet, knees, and hips feel after each hike.
Build Cardio and Leg Strength
A solid training plan for a challenging hike includes cardiovascular exercise (running, cycling, stair climbing) three to four times per week and leg strength work (squats, lunges, step-ups) two to three times per week. For multi-day trips, train with a loaded backpack, starting with 15 pounds and gradually working up to your expected trail weight over 8 to 12 weeks.
Break in Your Boots
Never wear brand-new boots on a long hike. Break them in with progressively longer walks over several weeks. This lets the boot mold to your foot shape and reveals any hot spots before they become trail-ending blisters on your actual trip. Wear the same socks you plan to hike in during the break-in period.
Essential Gear
The gear you carry depends on whether you are day hiking or backpacking, but some items are non-negotiable regardless of trip length.
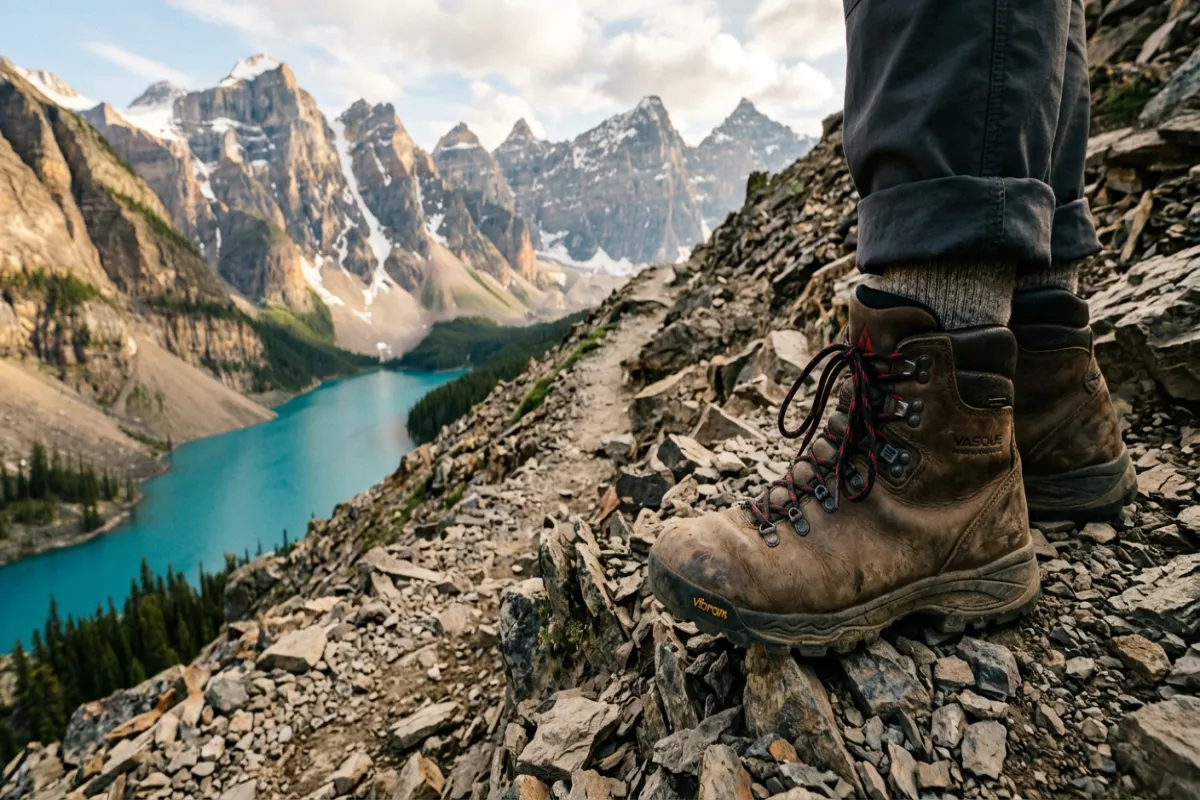
Footwear
Footwear is the single most important gear decision. Hiking boots provide ankle support and protection on rough terrain. Trail runners are lighter and dry faster, making them popular for well-maintained trails and thru-hikes. Whatever you choose, prioritize proper fit over brand name. Visit an outdoor retailer where staff can measure your feet and recommend options. Your hiking shoes should have at least a half-size of extra room in the toe box to accommodate foot swelling on longer hikes.
Clothing Layers
Dress in layers so you can adjust to changing conditions. A moisture-wicking base layer keeps sweat off your skin. An insulating mid-layer (fleece or lightweight down) provides warmth. A waterproof and breathable outer layer protects against rain and wind. Avoid cotton, which holds moisture and loses insulating ability when wet. Synthetic or merino wool fabrics are far better choices for hiking.
Backpack Sizing
For day hikes, a 15 to 30-liter pack holds everything you need. Overnight trips typically require 40 to 65 liters. Multi-day thru-hikes often use 50 to 70-liter packs. Get fitted at a gear shop to ensure the hip belt and shoulder straps match your torso length. Most of the pack weight should ride on your hips, not your shoulders.
Trekking Poles
Trekking poles reduce stress on your knees by up to 25% on descents, improve balance on uneven terrain, and help maintain a hiking rhythm. Adjustable poles work best because you can shorten them for uphill sections and lengthen them for downhill stretches. They are especially valuable on steep terrain and when carrying a heavy pack.
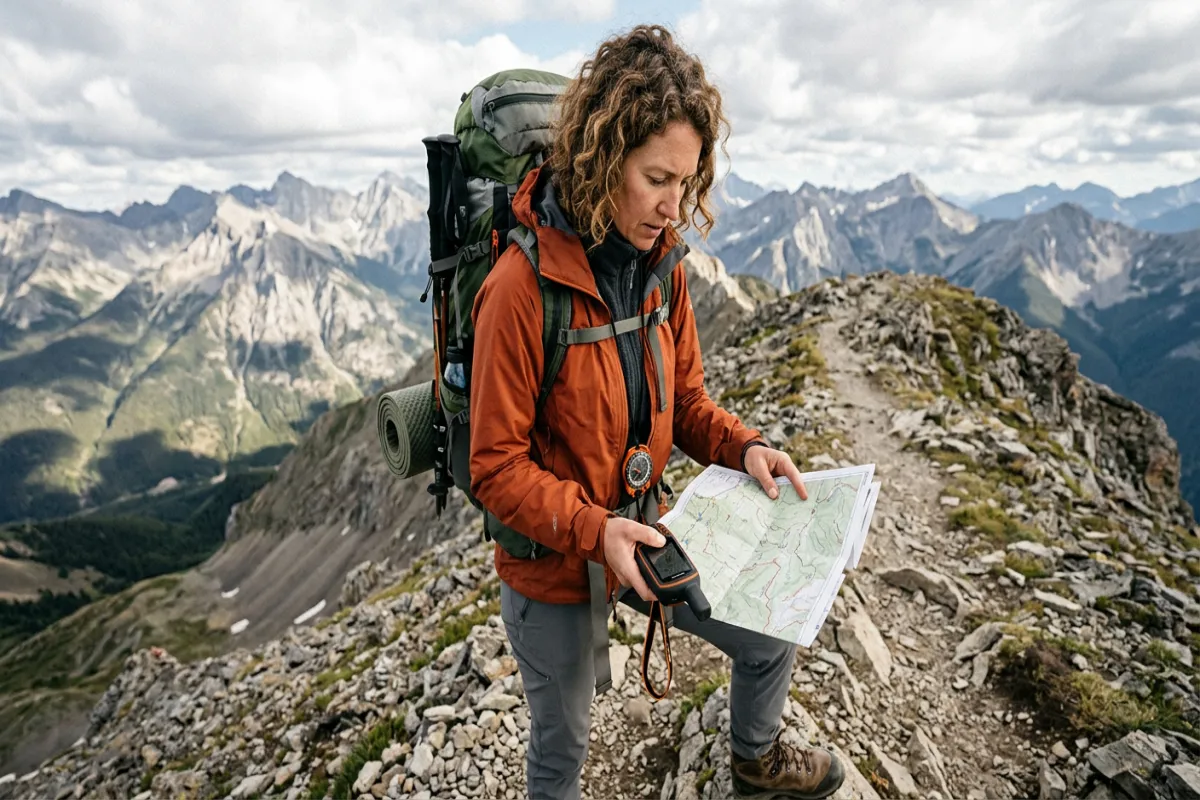
Navigation
Carry a GPS-enabled device or smartphone with offline trail maps downloaded. A dedicated GPS unit or personal locator beacon adds a safety layer, especially in remote areas. Always bring a paper map and compass as backup. Electronics can fail, run out of battery, or lose signal when you need them most.
Water Filtration
For hikes longer than a few hours where you will need to refill from natural sources, carry a water filtration system. Options include pump filters, squeeze filters (like the Sawyer Squeeze), gravity filters for groups, UV purifiers (like the SteriPEN), and chemical tablets. Squeeze filters are the most popular choice among backpackers for their combination of light weight, reliability, and fast flow rate.
First Aid Kit
A hiking first aid kit should include adhesive bandages, blister treatment (moleskin or blister pads), antiseptic wipes, pain relievers, antihistamines, medical tape, tweezers, and any personal medications. Pre-made hiking first aid kits are available, but customize yours based on your specific needs and the length of your trip.
Sun and Rain Protection
Sunburn can happen even on cloudy days, especially at higher elevations where UV exposure increases roughly 10% for every 3,000 feet of elevation gain. Bring sunscreen (SPF 30 or higher), sunglasses with UV protection, and a brimmed hat. A lightweight rain jacket should live in your pack year-round since mountain weather changes fast.
The Ten Essentials
The Ten Essentials system was developed by The Mountaineers organization and has been the standard hiking safety framework for decades. The National Park Service, American Hiking Society, and outdoor retailers like REI all recommend carrying these items on every hike, even short ones.
- Navigation – Map, compass, GPS device or phone with offline maps, altimeter
- Sun protection – Sunscreen, sunglasses, lip balm with SPF, sun-protective clothing
- Insulation – Extra clothing layers beyond what you expect to need, including a warm hat and gloves for mountain hikes
- Illumination – Headlamp with extra batteries (LED headlamps last the longest and keep your hands free)
- First aid supplies – A kit appropriate to your trip length, plus any personal medications and insect repellent
- Fire – Waterproof matches, lighter, and fire starter (for emergency warmth and signaling, not campfires)
- Repair tools and knife – Multi-tool, knife, duct tape wrapped around a trekking pole or water bottle, cord or rope
- Nutrition – Extra food beyond what you plan to eat, enough for at least one additional day in case of emergency
- Hydration – Extra water and a way to purify or filter more from natural sources
- Emergency shelter – Emergency bivy, space blanket, or lightweight tarp to protect against unexpected overnight stays
The logic behind the Ten Essentials is simple: if something goes wrong and you are stuck on the trail longer than planned, these items keep you alive and help rescuers find you.
Safety on the Trail
Most hiking accidents are preventable with basic awareness and preparation.
Tell Someone Your Plan
Before every hike, tell a trusted person your planned route, expected return time, and what to do if you do not check in by a specific time. This is the most important safety step you can take. If you are injured or lost, this information helps search and rescue teams find you faster.
Check the Weather
Check the forecast for your hiking area on the morning of your hike and be prepared to postpone if severe weather is expected. Mountain weather can change rapidly, so check forecasts specific to the elevation you will be hiking at, not just the nearest town.
Know Your Limits
The most common cause of hiking emergencies is people attempting trails beyond their ability level. Be honest about your fitness and experience. There is no shame in turning back if a trail feels too difficult or conditions deteriorate. Set a turn-around time before you start and stick to it, especially on out-and-back hikes where the return takes just as long as going out.
Wildlife Encounters
In bear country, carry bear spray and know how to use it. Make noise on the trail to avoid surprising bears. If you encounter a black bear, make yourself appear large, speak firmly, and back away slowly. For grizzly bears, do not run. If a grizzly charges, play dead by lying face down with your hands clasped behind your neck. Store food in bear canisters or hang it from a bear wire at camp.
Watch where you step and place your hands, especially in warm weather when snakes are active. Give any snake you encounter a wide berth. Most snake bites happen when people try to handle or get too close to snakes.
Altitude Sickness
Acute Mountain Sickness (AMS) can affect anyone hiking above 8,000 feet (2,500 meters), regardless of fitness level. Symptoms include headache, nausea, dizziness, and fatigue. Prevention starts with gradual acclimatization: if you are coming from sea level, spend a day at moderate elevation before hiking up high. Stay well hydrated, eat a carbohydrate-rich diet, and avoid alcohol. If symptoms develop, the only reliable cure is to descend to lower elevation.
Lightning Safety
In mountainous areas, thunderstorms typically develop in the early afternoon. Plan to be below treeline or off exposed ridges by noon. If you can hear thunder, you are within striking distance of lightning. If caught in a storm, get to a low point away from ridgelines, isolated trees, and bodies of water. Crouch on the balls of your feet with your head low if you cannot reach shelter. Keep metal objects like trekking poles at least 100 feet away from you.
Water and Food on the Trail
Hydration
A common guideline is to drink about half a liter (roughly 17 ounces) of water per hour of moderate hiking. In hot weather, on steep terrain, or at high altitude, you may need significantly more. Start your hike well hydrated and drink before you feel thirsty. Signs of dehydration include dark urine, headache, dizziness, and fatigue.
Water Sources and Filtration
For hikes where you need to refill from streams, springs, or lakes, always treat the water first. Even crystal-clear mountain streams can contain Giardia, Cryptosporidium, or other pathogens. Squeeze filters and UV purifiers are the fastest field treatment methods. Chemical tablets (chlorine dioxide) are the lightest backup option but take 30 minutes to four hours to work depending on the product.
Trail Food and Nutrition
Hiking burns 300 to 600 calories per hour depending on terrain, pack weight, and your body size. Pack calorie-dense foods that do not require cooking for day hikes: trail mix, energy bars, dried fruit, jerky, nut butter packets, and cheese. For multi-day trips, plan roughly 2,500 to 4,500 calories per day. Dehydrated meals are popular for backpacking because they are lightweight and only require boiling water.
Electrolytes
When sweating heavily, you lose sodium, potassium, and other minerals that water alone does not replace. Electrolyte tablets or drink mixes prevent cramping and fatigue on long or hot hikes. Salty snacks like pretzels and salted nuts also help maintain electrolyte balance.
Navigation Skills
Digital Navigation
Download offline maps on AllTrails, Gaia GPS, or a similar app before you leave home. Phone GPS works without cell service as long as you have maps downloaded. Keep your phone in airplane mode to conserve battery and bring a portable battery pack for longer trips.
GPS Devices
A dedicated GPS device like a Garmin inReach provides reliable navigation plus satellite communication for emergencies. These devices let you send SOS messages to rescue services from anywhere on Earth, even without cell coverage. The subscription runs about $12 to $65 per month depending on the plan.
Paper Map Backup
Carry a printed topographic map of your hiking area and know how to read contour lines, identify landmarks, and orient the map with a compass. If all your electronics fail, a paper map and compass can get you back to the trailhead.
Cairns and Trail Markers
Many trails are marked with blazes (painted marks on trees), cairns (stacked rocks), or posts. Learn the marking system used in your hiking area before you start. Above treeline, where trails cross bare rock, cairns are often the only way to stay on route. Do not build your own cairns, as this can confuse other hikers.
Leave No Trace
The Leave No Trace Center for Outdoor Ethics established seven principles that every hiker should follow. These protect the environment and ensure trails remain enjoyable for everyone.
- Plan ahead and prepare – Know the regulations for your area. Proper planning reduces the chance of needing to make choices that damage the environment.
- Travel on durable surfaces – Stay on maintained trails and camp on designated sites, rock, gravel, or dry grass. Walking off-trail damages fragile vegetation that can take years to recover.
- Dispose of waste properly – Pack out all trash, food scraps, and litter. For human waste in the backcountry, dig a cathole 6 to 8 inches deep at least 200 feet from water, trails, and camp.
- Leave what you find – Do not pick flowers, take rocks, or disturb historical artifacts. Leave natural and cultural features for others to enjoy.
- Minimize campfire impacts – Use a camp stove instead of a fire when possible. If you build a fire, use established fire rings, burn only small sticks, and make sure the fire is completely out before leaving.
- Respect wildlife – Observe animals from a distance. Never feed wildlife. Store food properly to avoid habituating animals to human food.
- Be considerate of other visitors – Yield to uphill hikers. Keep noise levels down. Step aside for pack animals. Leave the trail better than you found it.
Hiking with Kids
Getting kids on the trail early builds confidence, fitness, and a love of the outdoors. The key is matching expectations to their age and ability.
Age-Appropriate Trails
Toddlers and preschoolers do best on flat, short trails (1 mile or less) with interesting features like streams, bridges, or wildlife viewing spots. Kids ages 5 to 8 can handle 2 to 4 miles on moderate terrain with plenty of breaks. By age 10 and up, many kids can manage full-day hikes if they have been building up gradually. The National Park Service recommends choosing trails with specific destinations that give kids something to look forward to, like a waterfall or lake.
Making It Fun
Let kids set the pace and explore. Bring a magnifying glass for examining insects and plants. Play trail games like scavenger hunts or “I Spy.” Pack their favorite snacks. Celebrate reaching the destination. A positive first experience is worth more than a long mileage day.
Essential Supplies for Kids
Children dehydrate and overheat faster than adults. Bring more water and snacks than you think you will need. Apply sunscreen frequently and make sure they have proper footwear with good traction, not sandals or flip-flops.
Hiking with Dogs
Many trails welcome dogs, but regulations vary significantly by location.
Where Dogs Are Allowed
Most U.S. national parks do not allow dogs on trails, even on leash. National forests generally do allow dogs, as do many state and local parks. Always check the specific regulations for your trail before bringing your dog. Even where dogs are permitted, leash rules often apply.
Dog Safety on the Trail
Make sure your dog is fit enough for the planned distance. Dogs cannot sweat, so they are especially vulnerable to overheating. Carry extra water for your dog (roughly one ounce per pound of body weight per day). Avoid hiking with your dog during the hottest part of the day in summer. Check paws for cuts, thorns, and hot surface burns after the hike.
Budget Planning
Hiking can be as inexpensive or as costly as you make it. Here is what to expect.
Gear Investment
A basic day hiking setup (boots, pack, rain jacket) costs $200 to $400. A complete backpacking kit (tent, sleeping bag, pad, stove, pack, clothing) typically runs $800 to $2,000 for quality gear that will last years. You can reduce costs by buying used gear, shopping end-of-season sales, or renting expensive items like tents and sleeping bags for your first trips.
Park Fees and Permits
National park entrance fees range from $20 to $35 per vehicle for a seven-day pass. The America the Beautiful annual pass costs $80 and covers entrance to all national parks and federal recreation areas for a year. Backcountry permits range from free to $30 or more. Some popular destinations charge reservation fees on top of permit costs.
Trip Costs
Beyond gear and permits, budget for gas or transportation to the trailhead, food (both trail food and meals in nearby towns), and lodging if you are traveling to a distant hiking area. For multi-day backpacking trips, food costs roughly $10 to $20 per person per day if you prepare your own meals. Use our travel budget template to track all your hiking trip expenses in one place.
Sample Multi-Day Hiking Trip Planning Checklist
Use this checklist to make sure you cover every step when planning a multi-day hiking trip.
8+ Weeks Before
- Choose your destination and research trail options
- Check permit requirements and apply if using a lottery system
- Begin a fitness training program (cardio, strength, and loaded pack walks)
- Start breaking in new boots if needed
- Book lodging for pre- and post-hike nights if traveling to a distant area
4 to 6 Weeks Before
- Finalize your route and create a detailed itinerary with daily mileage targets
- Identify water sources, campsites, and emergency exit points along the route
- Purchase or rent any gear you still need
- Do a shakedown hike: pack everything and hike 5 to 10 miles to test gear and pack weight
- Plan your food menu and start purchasing non-perishable trail meals
1 to 2 Weeks Before
- Check current trail conditions and weather forecasts
- Download offline maps for your entire route
- Prep and package trail food
- Charge all electronics and pack extra batteries
- Print a paper map and trail description
Day Before
- Check the weather forecast one final time
- Pack your bag completely and weigh it
- Fill water bottles and prepare first-day snacks
- Share your detailed trip plan with an emergency contact
- Set out clothes and gear for an early start
Trailhead
- Sign the trail register if one exists
- Check your map against trail markers at the start
- Confirm your GPS is tracking properly
- Adjust pack straps for comfort before committing to the trail
Free Download: Hiking Trip Checklist
A printable hiking trip checklist covering footwear, layers, navigation, hydration, and trail safety. Covers day hikes and multi-day treks.
More free templates at yopki.com/templates
Planning Tools and Resources
- AllTrails – Trail discovery, reviews, offline maps (free with premium option)
- Gaia GPS – Detailed topographic maps and route planning
- Recreation.gov – Permits and campsite reservations for federal lands
- National Park Service (nps.gov) – Trail information, conditions, and alerts for national parks
- REI Expert Advice – Gear reviews and how-to guides from outdoor experts
- Yopki AI Travel Planner – Use our AI travel planner to help organize outdoor trips and build day-by-day itineraries
Frequently Asked Questions
How far in advance should I plan a hiking trip?
For day hikes, a few days of planning is usually enough. For overnight backpacking trips, start planning 4 to 8 weeks ahead. Multi-day trips to popular destinations with permit lotteries may require 6 to 12 months of advance planning.
What is the best time of year to go hiking?
Late spring through early fall offers the best conditions in most of North America. However, the ideal timing varies by region. Desert areas like the Grand Canyon are best hiked in spring or fall when temperatures are moderate. High mountain trails may not be snow-free until July. Research the specific conditions for your destination.
How much water should I carry on a hike?
Plan for about half a liter (17 ounces) per hour of hiking in moderate conditions. In hot weather or on strenuous terrain, increase to one liter per hour. For hikes where water sources are available, carry a filter so you can refill along the way.
Do I need hiking boots or are trail runners okay?
Both work depending on the terrain. Hiking boots provide better ankle support and protection on rocky, uneven trails. Trail runners are lighter and more comfortable on well-maintained paths. Many experienced long-distance hikers prefer trail runners for the weight savings. Choose based on the specific terrain you will encounter.
What should I do if I get lost on a hike?
Stop moving as soon as you realize you are lost. Stay calm and assess your situation. Try to retrace your steps to the last known point on the trail. If you cannot find the trail, stay put and make yourself visible and audible to rescuers. Use a whistle (three blasts is the universal distress signal) and bright clothing to attract attention. This is why telling someone your plan before you leave is so important.
Is hiking alone safe?
Solo hiking carries more risk than hiking with a partner because there is no one to help if something goes wrong. If you hike alone, always tell someone your exact route and expected return time, carry a satellite communicator or personal locator beacon, stick to well-traveled trails, and be extra conservative about your abilities. Many experienced hikers enjoy solo hiking, but it requires more careful preparation.
How do I prevent blisters on a hike?
Break in boots before long hikes, wear moisture-wicking socks (not cotton), and apply moleskin or athletic tape to known hot spots before they become blisters. If you feel a hot spot developing, stop immediately and address it. A small piece of moleskin applied early prevents a painful blister later.